Help & FAQs
Want to learn more? Give us a call today. 604-210-4600
(Note: Not Serving US Customers)
Setting Up Multi-Factor Authentication
What is changing?
To protect and secure your work information, company’s is expanding the use of Multi-Factor Authentication (MFA) for accessing the Microsoft Outlook Web Access application either remotely or using a company’s device logged-in with a shared ID.
Without MFA, company’s email has only one layer of protection – your password. If someone gets your username and password, they will have access to your company’s email, putting our systems at risk.
With MFA, anyone attempting to access your email will need access to your MFA authentication method before access is granted. This additional security step helps protect your information and our systems from unauthorized access, or harmful emails that could be infected with malware.
How Multi-Factor Authentication (MFA) works:
When using Microsoft Outlook Web Access (OWA) to access your email remotely or from a company’s workstation logged in with a shared ID, you will be prompted for the second method of authentication, as follows:
- You will enter your company’s username and password in the Microsoft Outlook Web Access.
- You will be asked to authenticate using your preferred method.
- You will allow or deny access to your company’s email.
There are several methods of authentication you can set up:
- Using the Microsoft Authenticator app on iOS or Android mobile device.
- Receiving a call or text to a cellphone.
- Receiving a call to an office phone or landline.
You must set up at least one authentication method, even if you never connect to your email remotely. We recommend that you set up at least two methods in case you do not have your primary options available. When selecting methods, consider ways in which you log on remotely and will need to use MFA – at home or travelling, using a smartphone or tablet, etc., and pick methods that you will be available to you at those times and locations.
You can change – add, delete, or update – your methods at any time by visiting https://mysignins.microsoft.com/security-info.
Setting up a Cellphone
This method of authentication requires a cellphone or mobile device with cellular service.
Click the + Add method and proceed to select Phone from the dropdown menu then click Add.
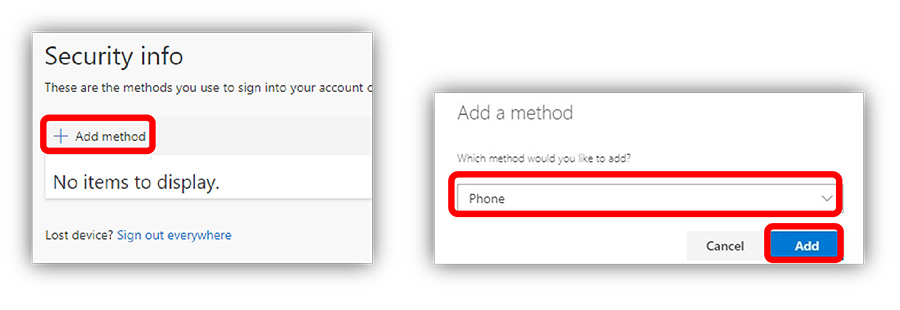
The following screen will appear, note there are two possible ways to authenticate with your cellular phone:
-
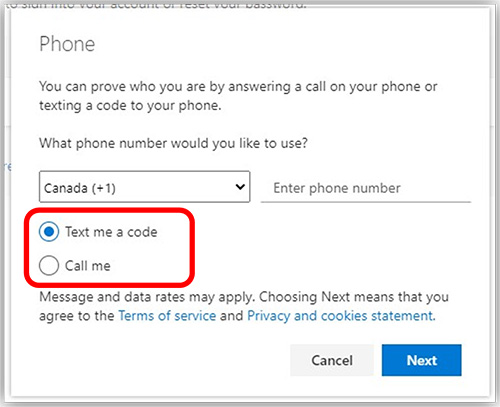
- Text me a code: You will receive a numerical code via SMS that you will be prompted to enter when authenticating your login.
- Call me: When attempting to login, you will receive a phone call in which an automated message will prompt you to press a key to authenticate the login.
Select your preferred choice from the bullet points below, whichever option you choose will be the default method. Note, that you can also choose to use the non-default method to authenticate later when logging in.
Under the first drop-down box, select the region as Canada (+1), then type your Phone number in the adjacent field
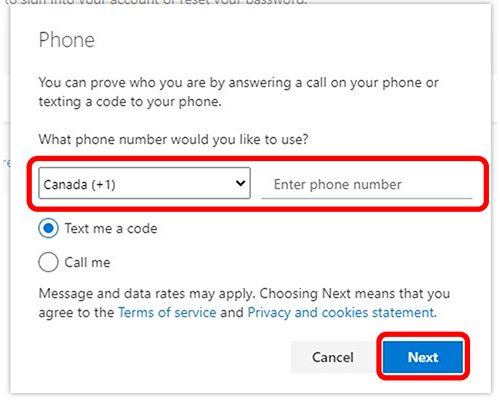
Afterward, click Next
You will now be prompted to authenticate using your cellphone by one of two methods, depending on which option you selected in Step 15.
- If you selected Text me a code:
The following screen will appear. You should have received an SMS text message containing the 6-digit code.
Note: If you did not receive a text message with
the code, double-check that the phone number is correct, then click Resend code.
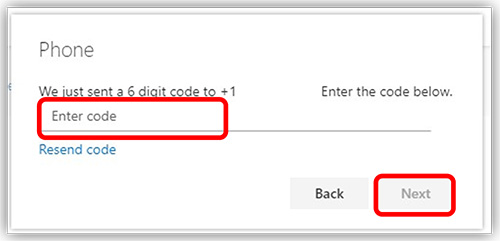
Enter the 6-digit code into the field, then click Next.
- If you selected Call my phone:
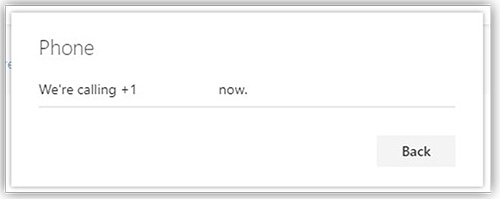
Answer the call, and follow the instructions relayed by the automated message. You will be prompted to Press Pound (#) to allow access.
- Upon completing the authentication, you will see either of the following messages:
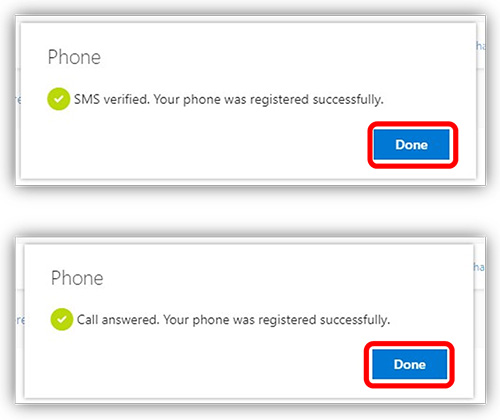
Click Done
You are now set up to use your phone as a method of authentication.
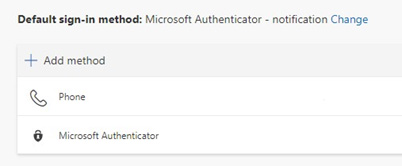
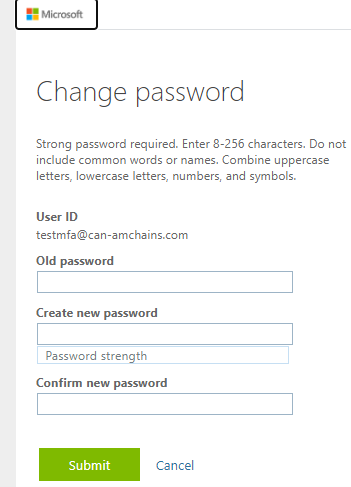
Changing Your Password
Login with your credential on https://mysignins.microsoft.com/security-info.
You can change your password with following method.

Click on password
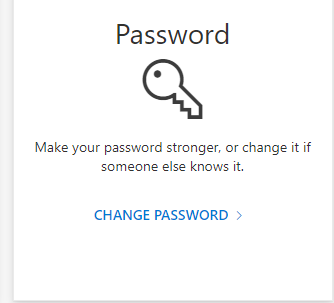
Click on change password and change the desire password.
Setting Up Your Multi-Factor Authentication Methods
- On your computer open this link in Microsoft Edge browser https://mysignins.microsoft.com/security-info. This screen will open. Click on + Add method

- You can change to Authentication Methods or change your phone number on it.
- Click Add once you have made your selection

Changing Your Authentication Methods
You can change your authentication methods at any time by returning to the https://mysignins.microsoft.com/security-info page. If you are not connected to the company’s network, you will need to authenticate using one of your existing authentication methods.
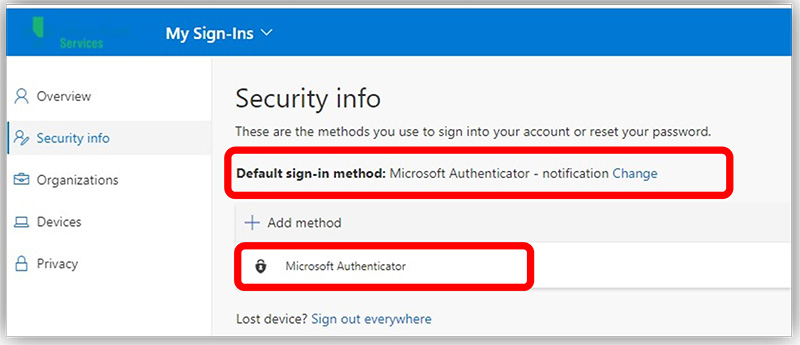
To change your default authentication method, click on Change to the right of your existing default method.
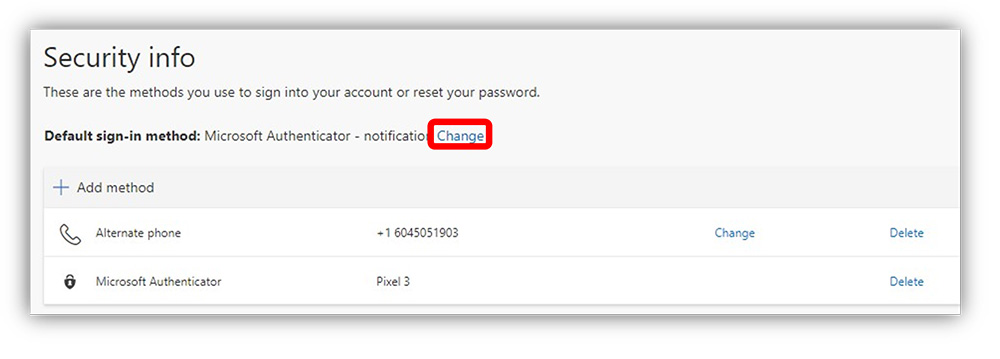
A drop-list will appear with all your available authentication methods, select your preferred default method and click Confirm. You will see the default sign in method change to your new preferred method.
To change any phone number, click on Change beside the phone number you want to change
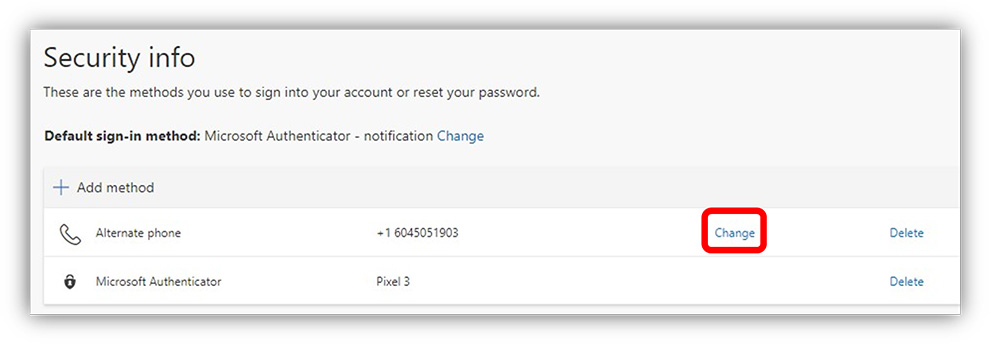
Update the country code and phone number to your new number and click Next. You will receive either a call or text, depending on the option you are updating to complete the set-up of your new number.
To delete an authentication method, click Delete beside the option you want to remove
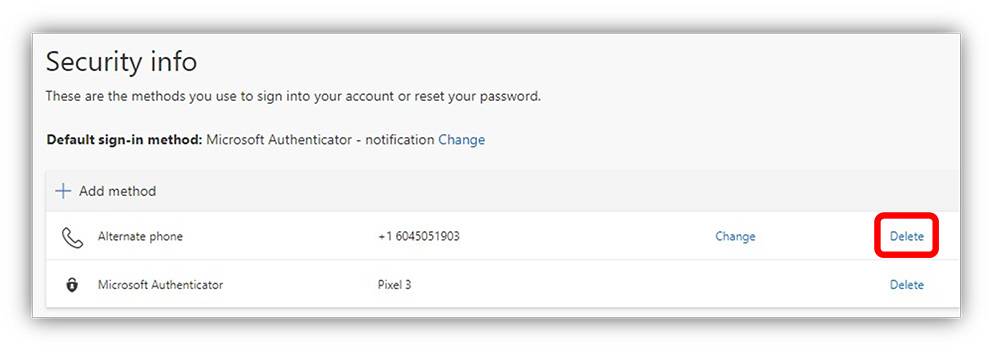
You will be asked to confirm you would like to delete this method? Click OK. After a short pause the method will be deleted from your list.
Note, if you delete your default sign-in method you will need to select a new default sign-in method.
Setting Up the Microsoft Authenticator App
This method requires a cellphone or tablet. Once installed the Microsoft Authenticator app can be used either to receive a notification or generate a code that can be used for authentication. A code can be generated when the device is not connected to a cellular network or wi-fi. The easiest way to complete the set-up of the authenticator app is to have two devices to work with, the cellphone or tablet you are installing the app on and a computer to follow the set-up steps.
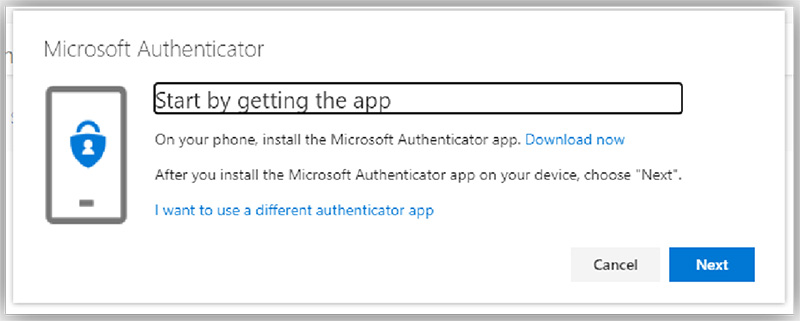
For iPhone, go to the App Store. On Android, go to the Google Play Store. Once on the respective app store, search for “Authenticator”. You will see a few authenticator products. Be sure to select Microsoft Authenticator. Tap on the Download or Install Icon
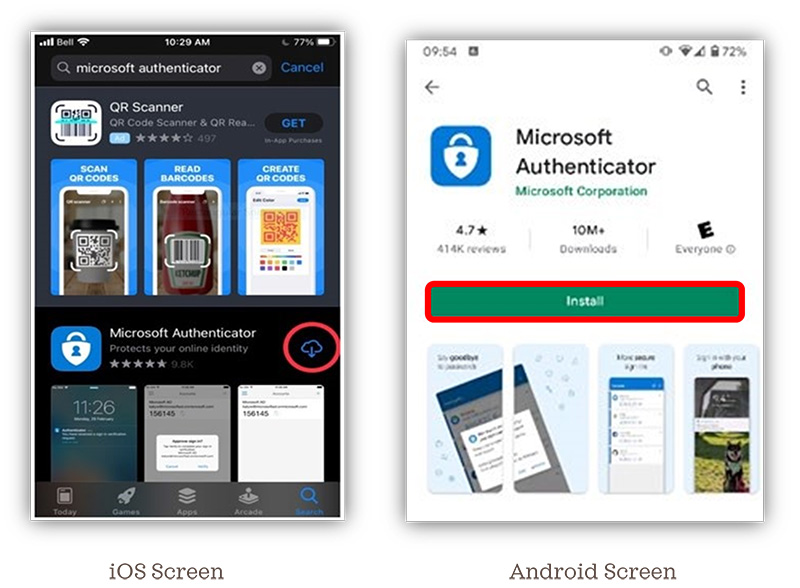
Once the download is complete, tap
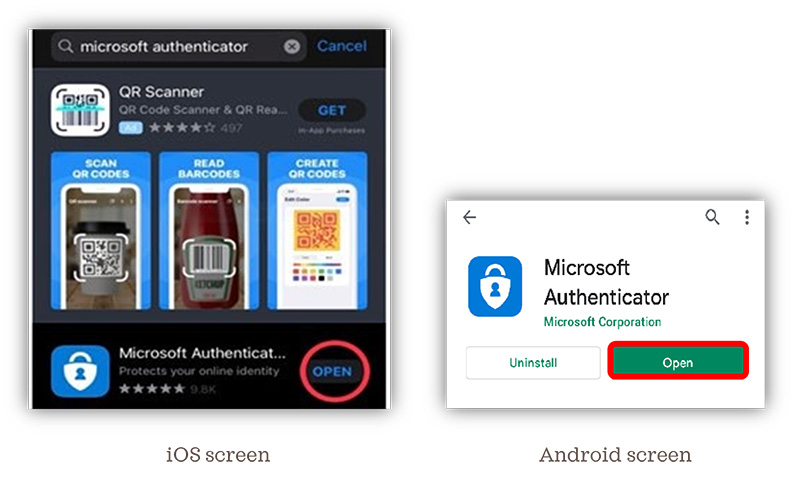
Tap I agree on the ‘Your Privacy Matters’ screen.
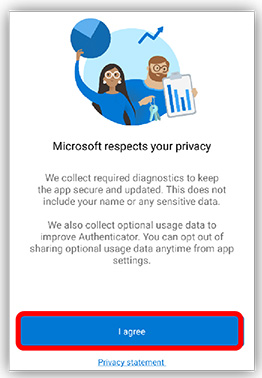
The following screen will appear. Tap on Scan a QR code
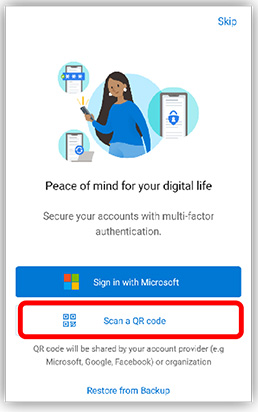
If prompted select the option to set up a work/school account.
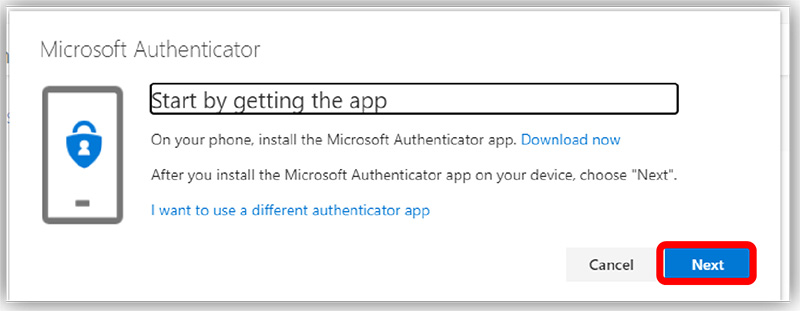
Once the camera is activated, return to your computer/laptop and click
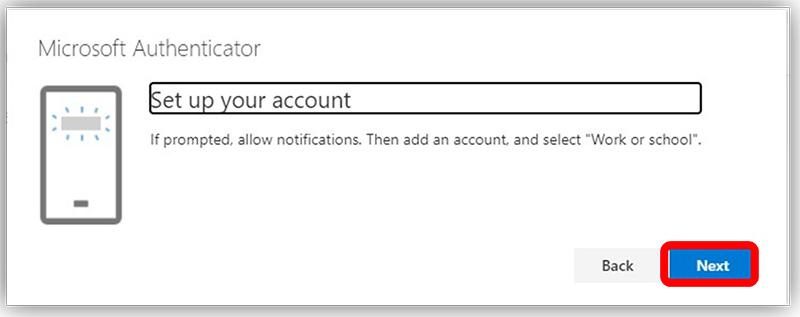
When the ‘Set up your account’ screen appears, click Next
Note: if you have an existing Alberta Health Service account set up in your Microsoft Authenticator app this will need removing by following these steps:
- In the App, tap the existing Alberta Health Service account
- Tap gear symbol in the top right corner
- Tap remove account
- Tap to confirm remove account
- Add account
- Work or school account
Use the camera on your phone or tablet to scan the bar code that appears on your screen. Note: Do not scan the barcode in the screenshot below, this will not work.
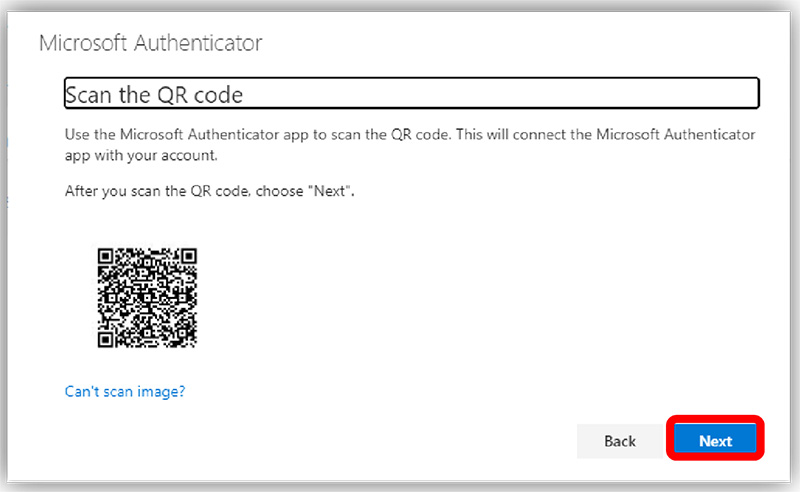
Once the scan is complete a message will appear on your cellphone or tablet confirming that the Alberta Health Services account has been added. Click Next on the computer screen.
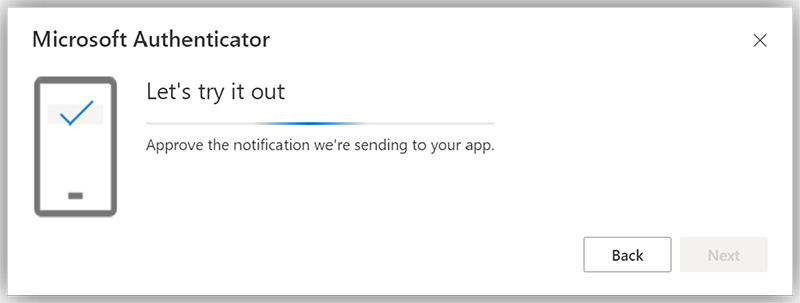
When the ‘Let’s try it out’ screen appears you will receive a notification on your cellphone or tablet to Allow or Deny access to your email. Tap Allow
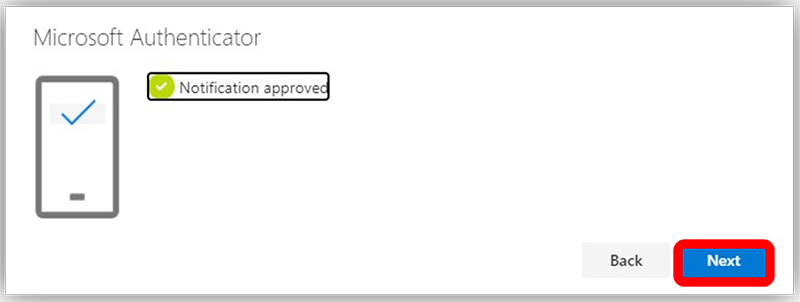
Once you have allowed access the computer screen will change to confirm that the notification was approved. Click Next.
Congratulations, your Authenticator App has now been successfully set up and is your default method of multi-factor authentication. This method will automatically be contacted when additional authentication is required.
Setting Up an Office Phone
This method of authentication requires a landline that is not a Lync phone.
Click on + Add method, proceed to select Office Phone from the dropdown menu. Click Add after making your selection.

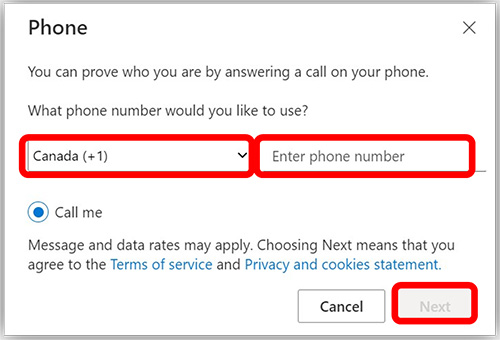
Enter the country code and the phone number in the fields and click Next
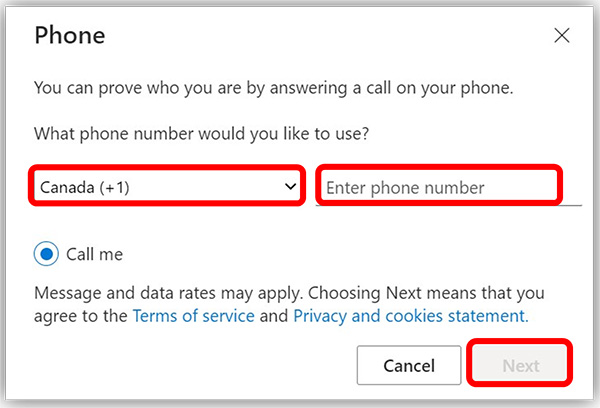
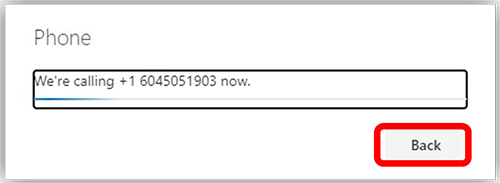
The following screen will appear, and you will receive a phone call. Answer the call, and follow the instructions. You will be prompted to Press Pound (#) to allow access.
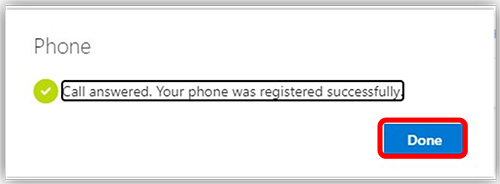
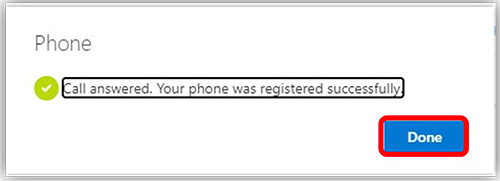
Upon completing, you will see the following message. Click Done to complete the setup.
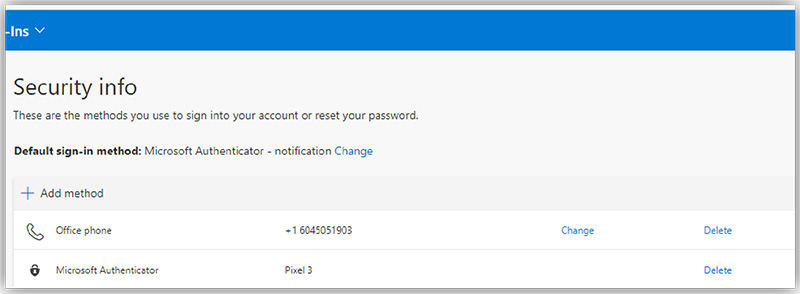
You will now see the Office phone as an authentication method with the number you set up.
Setting Up an Alternate Phone
This method of authentication requires any type of phone that is not a Lync phone.
Click on + Add method and select Alternate Phone from the dropdown menu. Click Add after making your selection.

Enter the country code and the phone number in the fields and click Next
The following screen will appear, and you will receive a phone call. Answer the call, and follow the instructions. You will be prompted to Press Pound (#).
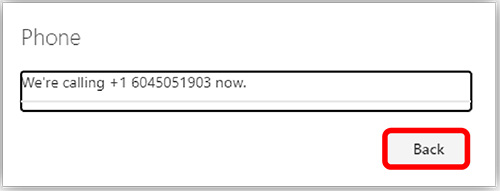
After you Press Pound # you will see the following message. Click Done to complete the setup.
You will now see the Alternate phone as an authentication option and the number you set up.

Request a Consultation
Protect your home with security that goes the extra mile to keep you aware and in control — from anywhere!
